A bonnet leading‑edge PPF strip is a simple and effective way to protect the front edge of your car’s bonnet from stone chips, grit, and everyday wear. Velderra’s DIY PPF kits are made for people who want straightforward protection without needing professional tools or experience. These PPF kits are easy to install and designed to fit neatly along the leading edge of the bonnet that takes the most impact from the road.
This article explains how you can easily install your bonnet protection strip using the easy to use items included in your kit. The process is simple, and the film gives you enough flexibility to adjust it as you go. Once applied, the strip blends naturally with the paint and provides long‑lasting protection.
Why the Bonnet Leading Edge Needs Protection
The front edge of the bonnet is exposed to everything the road throws up. Stones, grit, and debris hit this area first, especially at motorway speeds. Over time, this can lead to chips, marks, and dull patches in the paint. This is not only unattractive, but also leads to rust and expensive repairs if left un-treated.
A full‑bonnet PPF installation requires professional equipment and experience, but a leading‑edge strip gives you targeted protection exactly where it’s needed. Because the strip is only around 15–20 cm wide, it’s easy to position and smooth out. It covers the most vulnerable areas without changing the look of the car or requiring specialist skills.
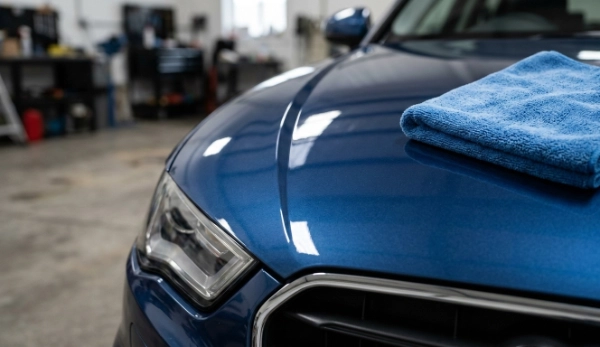
What You Need
Velderra bonnet strip kits include the PPF film and the essential tools needed for an easy installation. Typically, our kits include will include some or all of the items below:
- Spray bottle with slip solution (to help easily position the protective strip)
- Spray bottle with tack solution (for thorough surface preparation and bonding of the PPF to the paintwork)
- Clean squeegee
- Microfiber cloth
- A clean working area out of direct wind and dust
These items help the film glide into place, settle neatly, and stay secure.
Step 1: Clean the Bonnet Edge
A clean surface helps the film sit smoothly and look clear once applied. Start by washing the front edge of the bonnet with a pH‑neutral shampoo. Rinse and dry the area thoroughly.
If the paint feels slightly rough, use a clay bar or clay mitt with plenty of lubrication to remove any embedded particles. This step only takes a few minutes and helps the film sit flat.
Finish by wiping the area with isopropyl alcohol to remove any remaining oils or waxes. The goal is simply to make sure the surface is clean and smooth.
Step 2: Check the Position Before Removing the Liner
Hold the strip against the bonnet to get a sense of where it will sit. This helps you understand the length and alignment before you start. The strip naturally follows the curve of the bonnet edge, so you don’t need to stretch it or force it into place.
Once you’re familiar with the position, peel the liner and spray both the adhesive side of the film and the bonnet edge with slip solution. Slip solution gives you time to adjust the strip without it sticking too early.
Step 3: Align the Strip
With the film floating on slip solution, slide it gently into place. Aim for an even margin along the bonnet edge. The strip should sit straight and follow the natural line of the panel.
If the film moves too freely, use a little less slip solution. If it grabs too quickly, add a bit more. The strip gives you enough working time to adjust it until it looks right.
Step 4: Smooth the Film with the Squeegee
Once the strip is aligned, start smoothing it down with the squeegee. Begin in the centre and work outward in overlapping strokes. Keep the squeegee edge wet so it glides easily and doesn’t mark the surface of the film.
The aim is to push the slip solution out from under the film so the adhesive can settle. Use steady, even pressure. You don’t need to press hard, just enough to guide the film into place.
Step 5: Secure the Front Edge with Tack Solution
After the main area is smoothed down, lift the front edge of the strip slightly and spray a small amount of tack solution underneath. This helps the film settle firmly along the leading edge of the bonnet.
Use the squeegee to press the edge down in a smooth, continuous motion. The tack solution helps the film stay in place without lifting.
This action gives the strip a clean, finished look and ensures it stays secure over time.
Step 6: Check for Bubbles or Dust
If you see a small bubble, you can usually push it out with the squeegee. If a tiny piece of dust gets trapped, lift the film gently, rinse the area with slip solution, and smooth it back down.
The strip is generally very easy to adjust, provided you use plenty of spray to give you enough flexibility to correct anything you notice along the way.
Step 7: Let the Film Settle
Once the strip is fully applied, give it time to settle. Avoid washing the car for 24–48 hours. The film will become clearer as the remaining moisture evaporates.
After that, you can treat the bonnet as normal. The strip will sit neatly along the edge, protecting the paint from chips and wear.
What to Expect After Installation
A bonnet leading‑edge strip is a simple upgrade that makes a noticeable difference over time. The film is clear, durable, and designed to handle everyday driving conditions. Once settled, it blends naturally with the paint and is barely noticeable unless you look closely. The bonnet protection strip protects the area that takes the most impact from the road, helping the paint stay in good condition for longer. It’s a practical addition for anyone who drives regularly, especially on motorways or rural roads where loose stones are common.