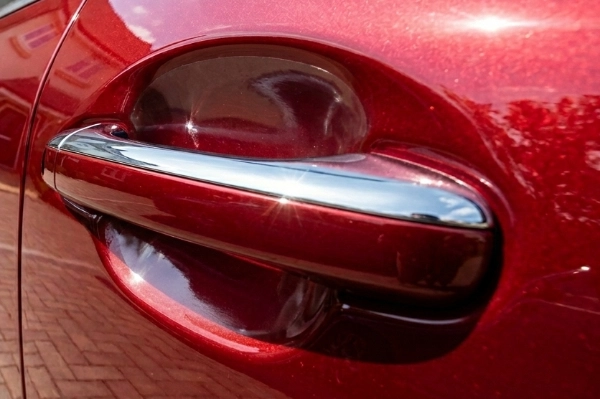
Door cups are one of the most vulnerable areas on any vehicle. Every time you reach for the handle, your fingernails, rings, keys, or even the edge of a shopping bag can catch the paint. Over time, these small contacts create a cluster of scratches that dull the finish and stand out against otherwise well‑kept paintwork. It’s a frustrating problem because it happens slowly and almost invisibly, until one day you notice the damage and realise it’s been building for years.
Velderra Door Cup Protectors exist for exactly this reason. They’re precision‑cut from high‑quality paint protection film (PPF) to fit the natural curve of your door cups, creating a clean, invisible barrier that absorbs everyday wear. They’re simple to install, long‑lasting, and designed specifically for DIY use, making them one of the most effective and accessible upgrades you can make to your car’s paint.
This guide walks you through the installation process in a clear, helpful way. It’s written for anyone, whether you’ve installed PPF before or you’re completely new to it. With Velderra’s pre‑cut protectors and a steady approach, you can achieve smooth, professional‑looking results in minutes.
Why Door Cups Need Dedicated Protection
Door cups sit in a tight, shadowed recess behind the handle. It’s a natural pinch point for your fingers, and because the space is small, it’s easy to scrape the paint without noticing. Common causes of damage include:
- Fingernails catching the paint as you pull the handle
- Rings or bracelets brushing the surface
- Keys swinging forward as you open the door
- Bags or jackets grazing the recess
- Dirt and grit trapped under your fingers
These marks are usually shallow but highly visible. They accumulate quickly, especially on darker paint colours where scratches reflect light more sharply.
Velderra Door Cup Protectors solve this problem by adding a thin, self‑healing layer of PPF that takes the impact instead of your paint. Because they’re pre‑cut to shape, they sit naturally inside the recess and blend seamlessly with the surrounding paintwork. Once installed, they’re almost invisible, but the protection they provide is significant.
Why Velderra Door Cup Protectors Are the Right Choice
Not all PPF is created equal, and door cups are a deceptively tricky area. The shape is curved, the space is tight, and the film needs to conform smoothly without creasing. Velderra Door Cup Protectors are designed specifically for this challenge.
They offer several advantages:
Precision‑cut fitment: Each piece is shaped to match the natural curve of the door cup, reducing the risk of wrinkles or misalignment.
High‑quality PPF: The film is clear, durable, self‑healing, and designed to remain invisible once installed.
Beginner‑friendly design: The size, shape, and flexibility of the film make installation straightforward, even for first‑time users.
Clean, invisible finish: The film blends seamlessly with the paint, preserving the original look of your car.
Long‑term durability: Once installed, the protectors resist scratches, wear, and UV exposure for years.
Because the pieces are pre‑cut, you avoid the risks associated with trimming film yourself such as uneven edges, poor fitment, or accidental cuts to the paint. Velderra’s approach removes the guesswork and gives you reliable, repeatable results.
What You’ll Need
Velderra Door Cup Protectors are designed to be installed with minimal tools. Most of what you need is already included in our standard DIY PPF kits.
You’ll need:
- Velderra Door Cup Protectors
- Tack solution (which thoroughly cleans the paint surface)
- Slip solution (this is a special liquid, sprayed onto the film and paintwork to allow easy adjustment)
- A small squeegee
- Microfiber cloths
- Spray bottles
These simple tools give you full control during installation, allowing the film to glide into place before setting firmly.
Preparing the Door Cup
A clean surface is essential for a smooth, long‑lasting installation. Door cups collect oils, dirt, and grit, so take a moment to prepare the area properly.
Wash the door cup with car shampoo, rinse thoroughly, and dry with a clean microfiber cloth. Then wipe the recess with the tack solution to remove any remaining oils. The goal is a completely clean, dry surface that allows the film to bond securely.
This step alone makes a noticeable difference in the final result. A clean surface ensures the film sits flush, adheres evenly, and remains invisible once installed.
Positioning the Protector
Spray the inside of the door cup generously with slip solution. This creates a thin layer of lubrication that allows the film to float and move freely into the correct position.
Peel the Velderra Door Cup Protector from its backing and spray the adhesive side with slip solution as well. This prevents premature sticking and gives you time to position the film accurately.
Place the protector inside the door cup and let it glide into place. Because the film is pre‑cut to shape, it naturally aligns with the curve of the recess. You can make small adjustments by nudging the film gently until it sits centred and even.
This is where Velderra’s precision‑cut design makes the biggest difference. Instead of fighting the film or trying to shape it manually, you’re simply guiding it into the position it was designed for.
Smoothing the Film
Once the protector is aligned, begin smoothing it from the centre outward using a small squeegee or the microfiber cloth. Work slowly and methodically, pushing the slip solution out toward the edges. The film will start to settle into the curve of the door cup.
If you see small wrinkles or pockets of moisture, lift the film gently, re‑wet the area with slip solution, and smooth again. The flexibility of Velderra’s film allows it to conform naturally without forcing it.
When the centre is smooth, spray a light mist of tack solution around the edges. This helps the perimeter grip the paint and stay in place. Use the squeegee to press the edges firmly, following the curve of the recess.
The result should be a clean, even surface with no visible bubbles or creases.
Final Checks and Aftercare
Inspect the door cup from different angles. The protector should sit flush, with sealed edges and a smooth, clear finish. Any small moisture marks will disappear as the film cures.
For the first 24 hours:
- Avoid washing the car
- Avoid pressure washing the edges
- Allow the film to settle naturally
Once cured, the protector becomes extremely durable and self‑healing, providing long‑term protection against everyday wear.
A Small Upgrade With a Big Impact
Door cup scratches are one of those small frustrations that can make an otherwise well‑kept car look tired. Velderra Door Cup Protectors offer a simple, effective solution that preserves your paint and keeps your car looking clean for years. They’re easy to install, precision‑cut for accuracy, and designed to blend seamlessly with your paintwork. Whether you’re protecting a new car or refreshing an older one, this small upgrade delivers a noticeable improvement in both appearance and long‑term durability.